However often you travel abroad, a mandatory arrival form brings the nagging feeling that something has been missed. The Philippine eTravel form is required for arrival and departure, and the entire thing takes about 10 minutes. It is also completely free, no matter what a lookalike website may try to charge.
Try free
Plan a trip in about 2 minutes
Tap through 8 quick cards for a complete itinerary with budget, maps, and packing lists. No account required.
Plan a trip →The gist:
- File at etravel.gov.ph, the official portal, or inside the government's eGovPH app (App Store and Google Play).
- The window opens 72 hours before arrival or departure. Earlier attempts are rejected.
- It is free. The portal says so twice on its front page. Sites charging a fee are not the government.
- You finish with a QR code. Airlines ask for it at boarding; customs scans it on landing.
- Both Philippine and foreign passport holders file it, by air or by sea.
What is the eTravel form?
eTravel is the Philippines' single digital arrival and departure declaration. It replaced the old paper arrival card and the separate health and customs forms with one online flow that ends in a personal QR code.
The registration screen spells the rule out word for word: "You may only register within 72 hours prior to your arrival or departure in the Philippines. Travelers are enjoined to present their eTravel QR code to flight boarding."
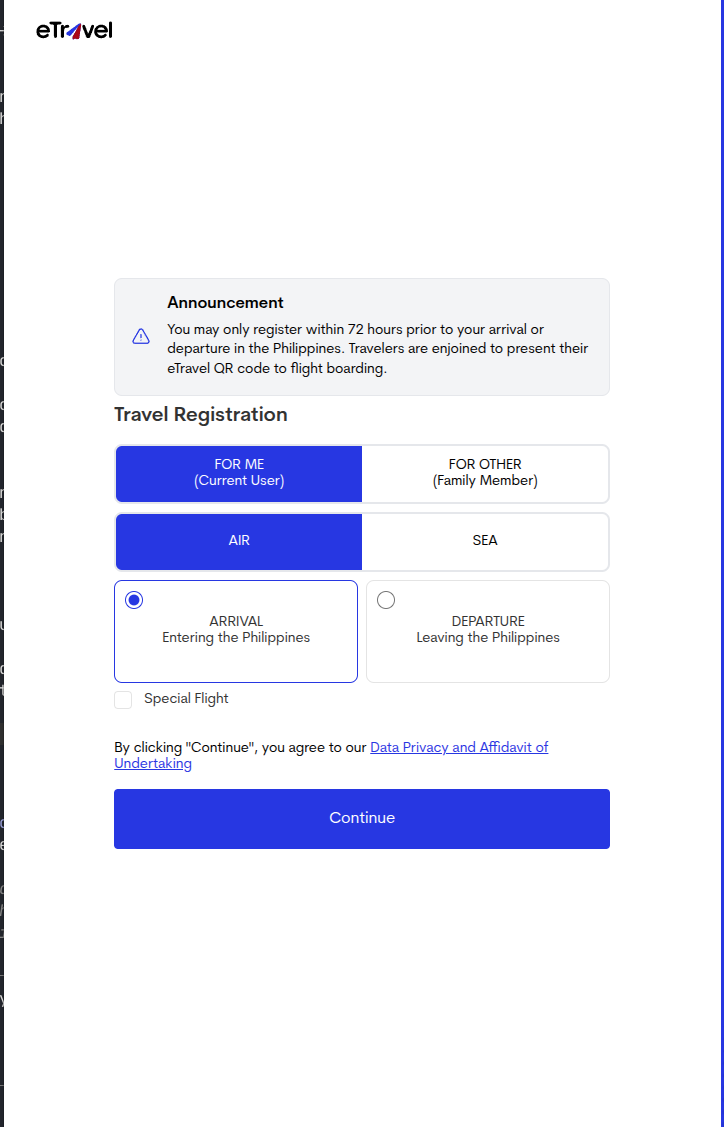
So do not try to be early. Booking three months out changes nothing here; this is a task for the last three days, next to online check-in. Set a reminder for 72 hours before each leg and file both directions of a round trip.
What do you need to fill it?
- Active email address to create an account.
- Your passport details
- Your booking details, both flight and accommodation.
- Your picture. The form lists no photo specification; a standard passport photo should work.
How do you create an account?
Start at etravel.gov.ph and register with your email address. The portal confirms it with a one-time code, then walks you into a traveler profile.
The profile asks for the identity page basics. Choose Philippine or foreign passport holder, then enter your name, sex, birth date, mobile number, citizenship, and passport number with its issuing authority and issue date.
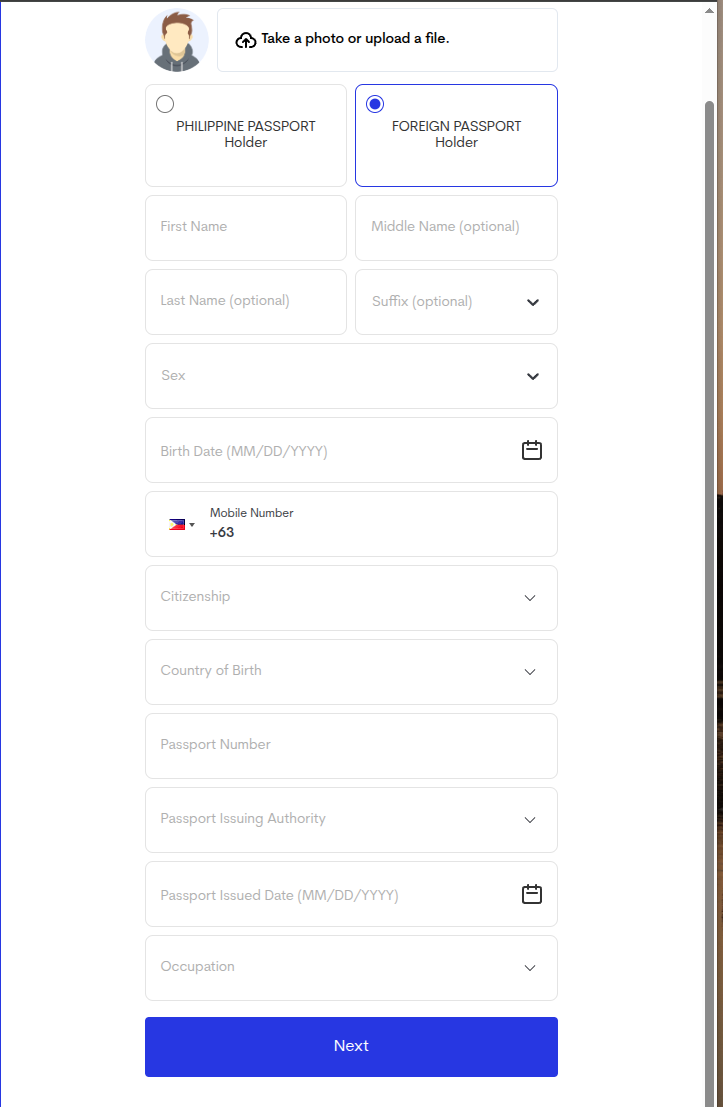
A permanent-country-of-residence step follows, then your profile is done. From the dashboard you can start a new travel declaration, file a cruise ship declaration, or add a family member, which is how one account covers a spouse or a child without separate logins.
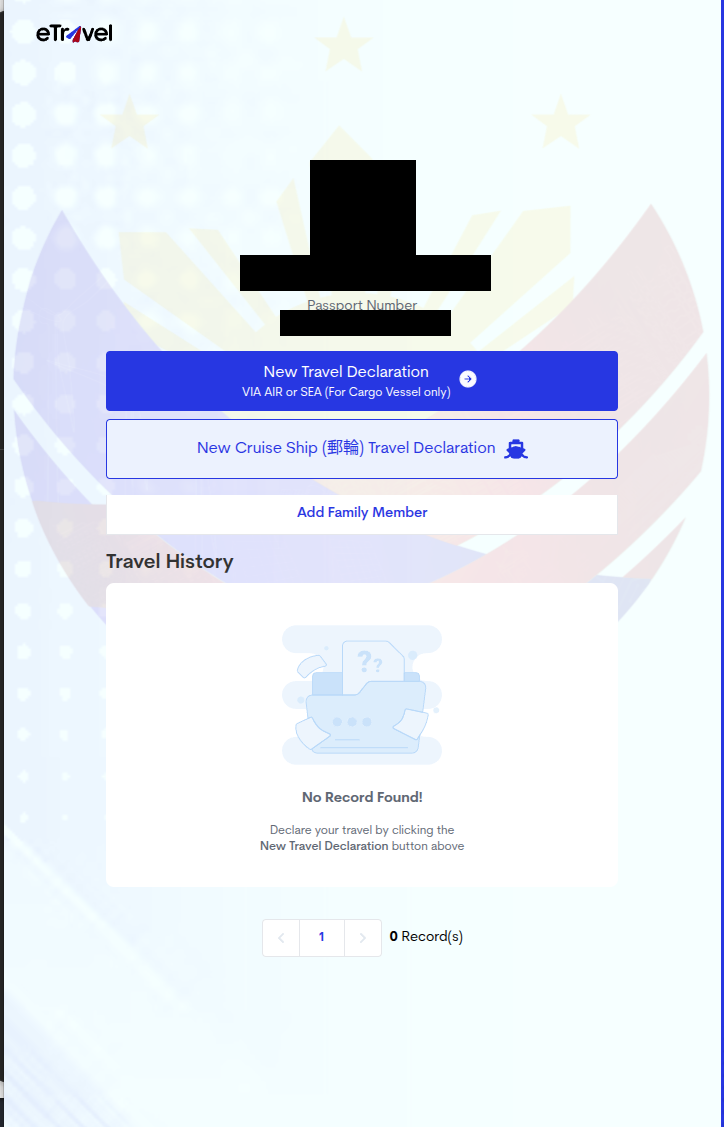
What does the travel declaration ask?
Pick arrival or departure, air or sea, and the form opens the travel details screen: purpose of travel, traveler type, airline and flight number, origin airport, and your date of arrival. It asks where you are headed first in the Philippines, a residence, a hotel, or transit through the airport, so keep your hotel booking handy.
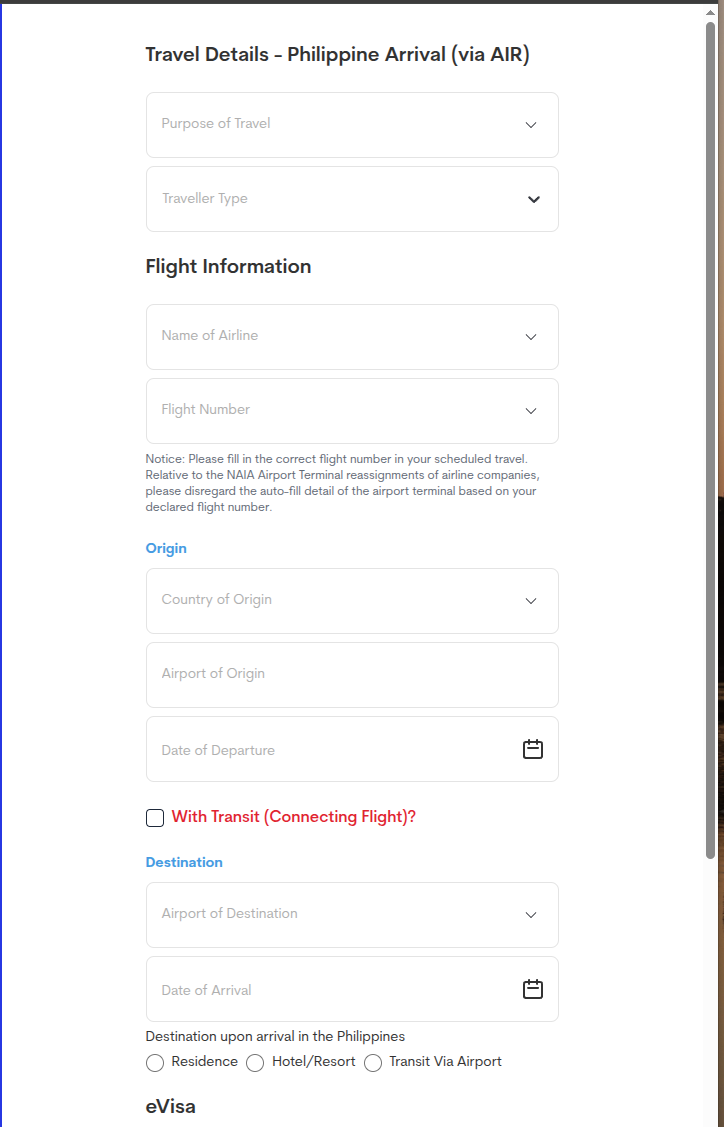
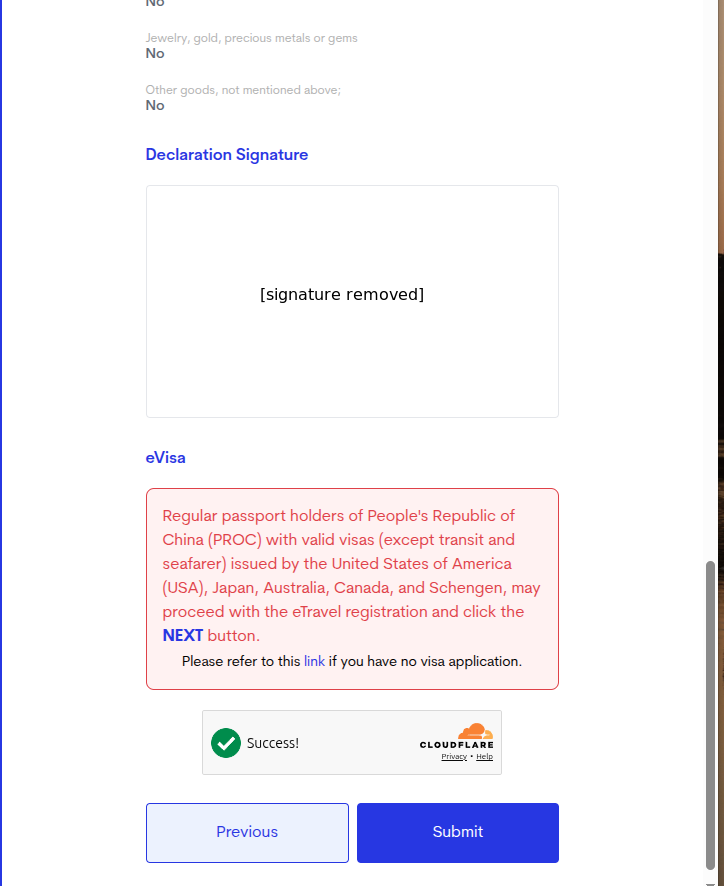
One note tucked into this screen as of August 2026: regular passport holders of the People's Republic of China with valid visas issued by the United States, Japan, Australia, Canada, or a Schengen state may proceed with eTravel registration directly. If that describes your passport situation, read that box carefully before continuing.
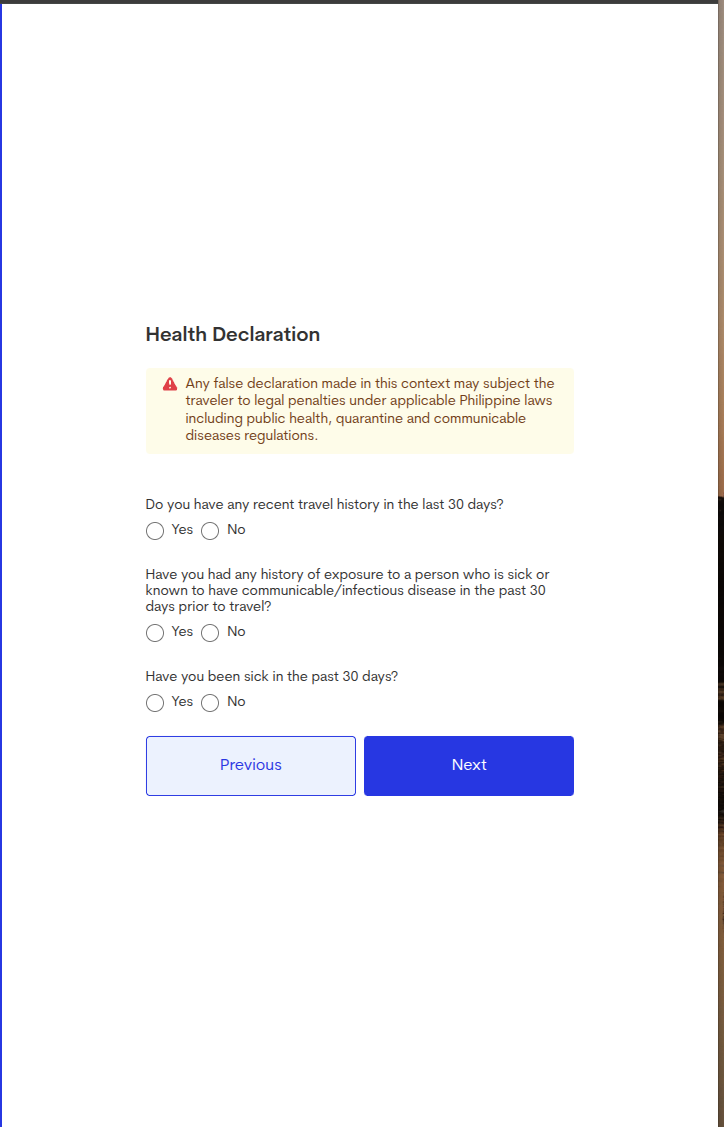
A short health declaration comes next, three yes-or-no questions about recent travel and illness in the past 30 days. Answer honestly; the form warns that false declarations carry legal penalties under Philippine health regulations.
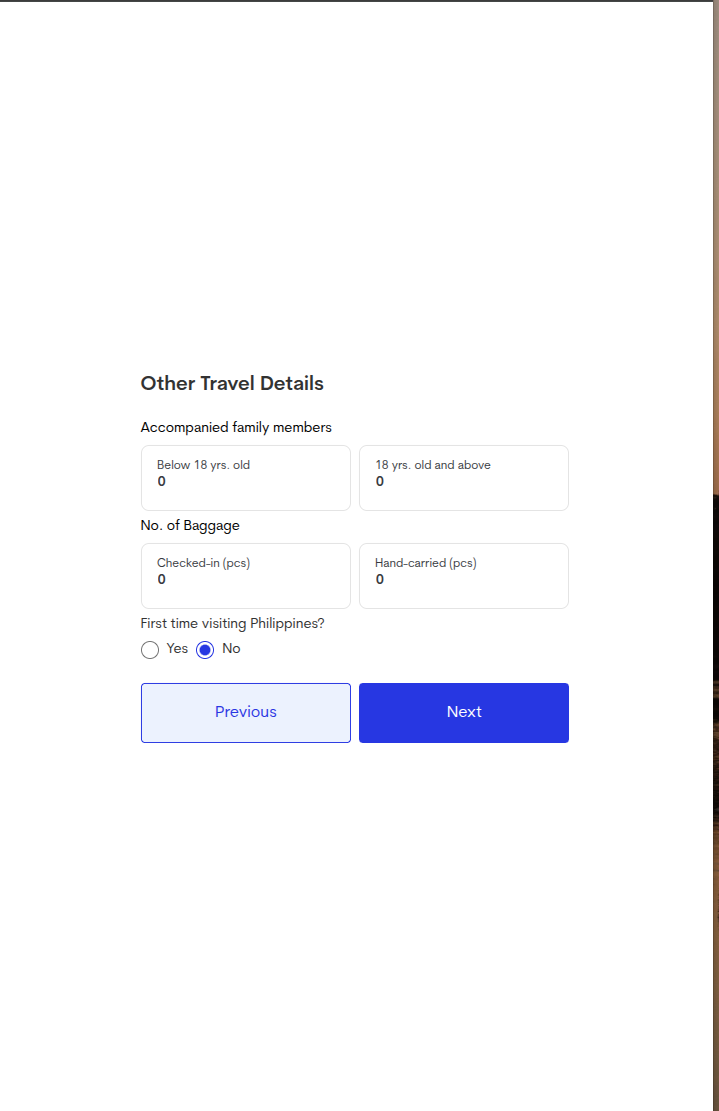
Then a final travel-details screen: accompanied family members, baggage counts, and whether this is your first visit.
What about the customs declaration?
Arrivals also complete the customs step. Most travelers tick through it quickly, but two thresholds shown on the form are worth knowing before you pack, per the declaration text as of August 2026:
- Philippine currency over PHP 50,000 must be declared, and amounts above that limit need prior written authorization from the central bank.
- Foreign currency over USD 10,000, or its equivalent, must be declared.
The same screens list what must be declared regardless of value, from firearms to food products, and note that goods worth PHP 10,000 or below enter duty-free. You sign the declaration on screen with your finger or mouse, confirm, and submit.
What does the QR code do?
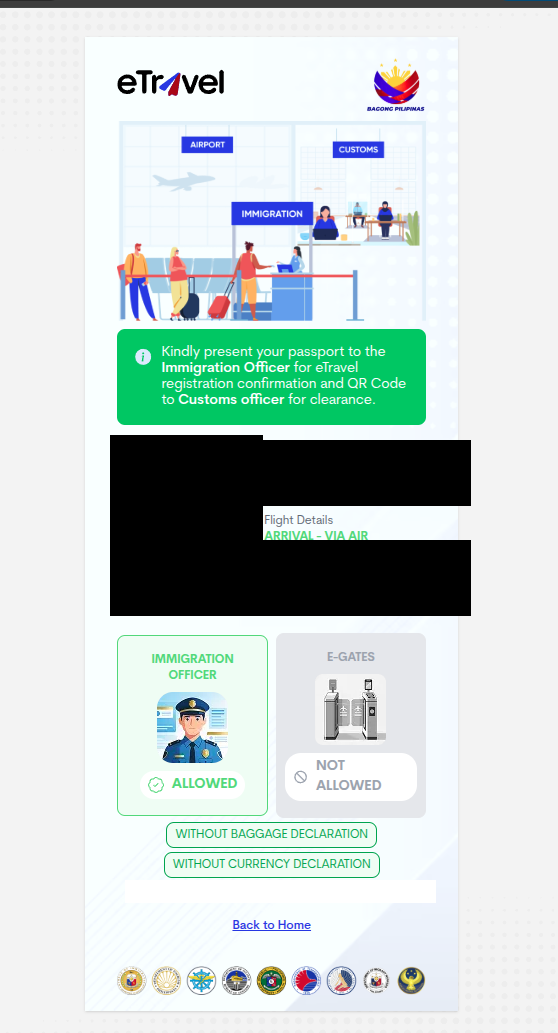
Submission produces the pass: your name, a reference number, your flight details, and the QR code.
What the pass itself tells you:
- Present your passport to the immigration officer for registration confirmation, and the QR code to the customs officer for clearance.
- It tells you which lane you may use. Depending on passport type it may mark the automated e-Gates as unavailable and direct you to the staffed counter.
- It carries its own validity date tied to your declared travel date, another reason the 72-hour window exists.
Screenshot it, and keep it somewhere you can find at the gate. Airlines check it at boarding, before you ever reach Philippine soil.
Where does eTravel fit in your trip planning?
The form is the last box to tick, not the first. It cannot be filed until 72 hours out. The real planning happens weeks earlier: choosing between El Nido and Siargao, and booking the inter-island flights that sell out first. A free AI trip planner can build that day-by-day Philippines plan with costs and maps in about a minute, and you can keep the eTravel reminder inside its pre-trip checklist.
If you plan on paper instead, the pre-trip checklist in the free travel itinerary template has a documents section where the eTravel deadline belongs, next to passport validity and travel insurance.
One habit worth keeping either way: calendar the 72-hour mark for both legs the day you book flights. The form takes 10 minutes when your passport and hotel address are at hand, and considerably longer at a departure gate on airport Wi-Fi.
Verified against etravel.gov.ph on August 27, 2026. Government forms change; when in doubt, the official portal is the only source that counts.

Written by Shobhit Shrivastava · Founder
Related reading
5 Days in Palawan: The Big Lagoon to Calauit Safari Park
This packed 5-day trip explores Palawan, starting with Puerto Princesa for its famous Subterranean River National Park and Honda Bay island hopping. You'll then transfer north to the laid-back Port Barton, spending days exploring its quieter beaches and island-hopping tours to pristine islets....
Google Trip Planner (2026): The 5 Tools Explained
Google has had no single trip planner since Google Trips closed in 2019. AI Mode in Search, Gemini, Maps lists, Google Flights and Calendar each cover a piece; Gemini scored 8 of 20 on a 7-day Tokyo test.
Best AI Trip Planner 2026: 11 Scored on One Tokyo Brief
Eleven AI trip planners received the same 7-day Tokyo brief in October 2026 and were scored on the Oh-No Travel Index. iMean and Gemini scored best of the outside tools; Mindtrip, now behind an account, answered 3 of 15 must-dos.
Best Travel Apps 2026: By Trip Phase, With Prices
Twelve travel apps grouped by when you open them: planning, flights, bookings, getting around, money and memories. What each one's free tier covers, the price of the paid one, and the setup most trips need.